

How to Build a Carport: The Ultimate Step-by-Step DIY Guide (2026)
Quick Answer: How hard is it to build a DIY carport, and how long does it take? Building a carport from scratch using stock-length materials is difficult and time-consuming, but utilizing a pre-engineered carport kit makes the process simple and highly achievable for DIYers. Most small carport kits can be completely installed in 2 to 4 days, while larger designs may take up to a week. The hardest and most critical part of the build is site preparation and ensuring the posts are perfectly level.
Why Pre-Engineered Carport Kits Are the Easiest Way to Build
If you are deciding between building from scratch and buying a kit, a carport kit is by far the better option. Excalibur Carports’ kits are specifically designed and prepared so that DIY assembly is as simple as possible.
Here is why a kit saves you massive amounts of time:
- Pre-Cut and Pre-Punched: The heavier gauge steel in the frame and posts comes pre-cut and pre-punched, which saves you from wearing out your tools, breaking drill bits, and wasting hours measuring and drilling.
- Cut-to-Length Roof Sheets: Where possible, roof sheets and flashings are cut to the exact lengths you need, leaving you with only minor final trimming.
- Consolidated Packaging: All materials arrive wrapped in a single pack, allowing you to quickly check off your parts list and start building immediately.
- Complete Documentation: Every kit comes with site-specific engineering drawings and an installation guide to lead you through the project. (Note: If you don’t want to build it yourself, you can still buy the kit and hire a local builder to erect it—you will still save substantial time and money.)
The Essential DIY Carport Tool Checklist
Modern carport kits are designed to be DIY-friendly, meaning you don’t need a full trade setup to achieve a professional result. Before you start, gather these essential tools:
Core Hand and Power Tools
- Cordless Drill & Impact Driver: Essential for driving screws and assembling the frame (Tip: have two batteries on hand).
- Socket Set & Spanners: Required for tightening the structural bolts throughout the frame.
- Tape Measure, Chalk Line, & Pencil: Accuracy is critical, as early errors affect the whole structure.
- Spirit Level & Laser Level: A spirit level is vital for keeping posts straight, while a laser level is excellent for checking ground levels during site prep.
- Tin Snips (Manual, Left & Right Handed): Needed for cutting roofing sheets and flashings. Electric snips or nibblers can speed this up.
- Rivet Gun: Required for fixing gutters, flashings, and finishing parts.
- Silicone / Caulking Gun: Used to seal joins and prevent leaks.
- Clamps: Highly helpful for temporarily holding steel components in place while you bolt them.


Safety and Access Equipment
- Access: Ladders, a mobile scaffold, or a scissor lift for larger builds.
- Safety Gear: Safety glasses, gloves, hearing protection, and steel-cap boots.
?? CRITICAL WARNING FOR CUTTING STEEL: Never use an angle grinder or cut-off saw on your roofing sheets, gutters, or flashings. The intense heat and sparks from grinding will destroy the Colorbond coating, causing rust spots to form over time. Always use tin snips, nibblers, or electric snips on these materials.
Step-by-Step Guide: How to Build Your Carport
While the time and effort change based on the roof type you choose, the basic steps remain the same for all designs.
Step 1: Marking and Installing the Posts
There are two ways to install your posts:
- Concreting into the ground (Preferred): This yields a stronger structure with better bracing against wind, and it looks cleaner without footing plates getting in the way. (Tip: Before placing posts in the holes, fit the two lengths of rod through the bottom of the posts to tag the concrete and assist with wind uplift).
- Bolting to existing concrete: You can only do this if you have proper footings under each column. A standard 100mm driveway slab is not thick enough to anchor a carport safely. You cannot use footing plates in cyclonic wind regions or for carports over 3 metres high.


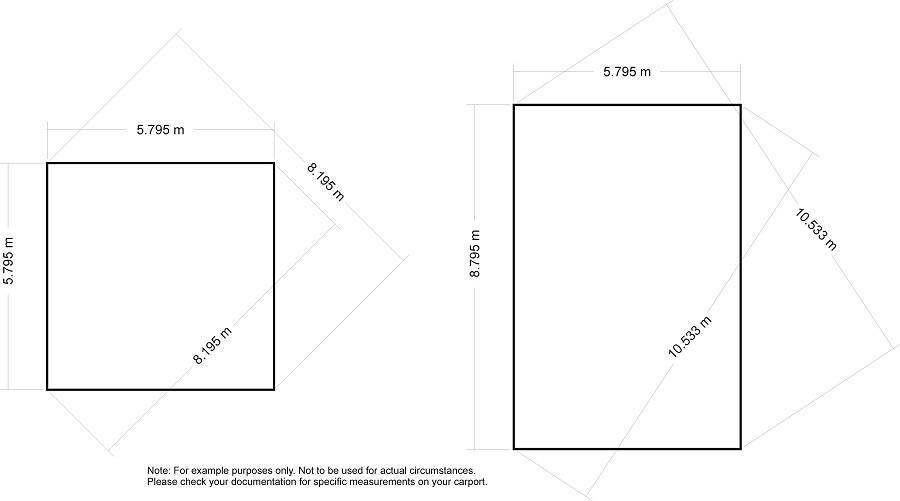
How to mark your post holes accurately: Check the “Post and Footing Layout” in your engineering drawings (remember, these use running dimension lines). To ensure your layout is perfectly square, use these two methods combined:
- Measure Both Diagonals: Measure corner-to-corner diagonally; both measurements must be exactly the same.
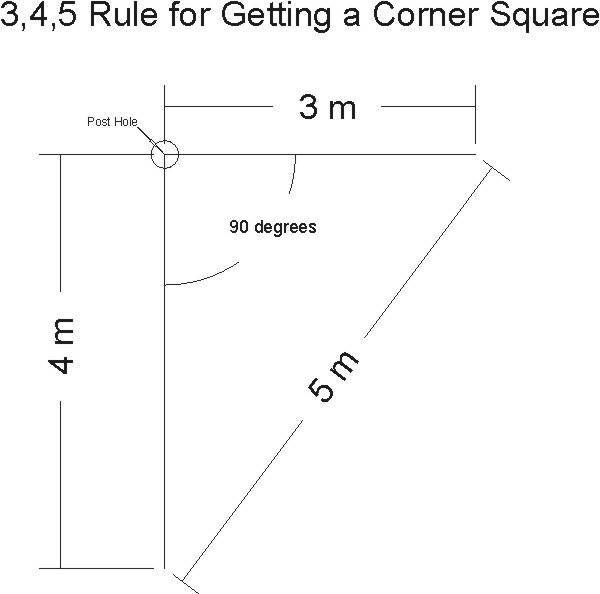
- The 3-4-5 Rule: Start at a corner, measure 3 metres down one side and mark it. Measure 4 metres down the adjacent side and mark it. The distance between those two marks must be exactly 5 metres for the corner to be a perfect 90 degrees.
Step 2: Connect the Frame to the Posts
Once your posts are sitting in their holes (unconcreted), bolt the main perimeter or fascia beams to the posts. Connect the rafters and purlins using the supplied brackets. Because it is a high-quality kit, the main frame simply bolts together with no drilling required. Only connect enough of the frame to lock the posts into the correct orientation—do not install roof sheets yet, as they create a dangerous wind load before the concrete cures.

Step 3: Concrete the Posts
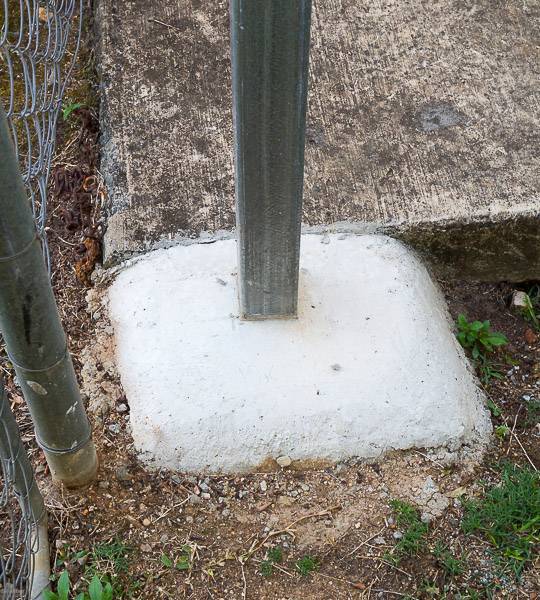
Now that the frame is holding the posts perfectly square and level, pour the correct concrete as specified in your engineering drawings. Dome the top of the concrete footings so that rainwater runs away from the steel posts, which minimizes long-term corrosion. Wait for the concrete to cure before proceeding.
Step 4: Install the Fascia Capping
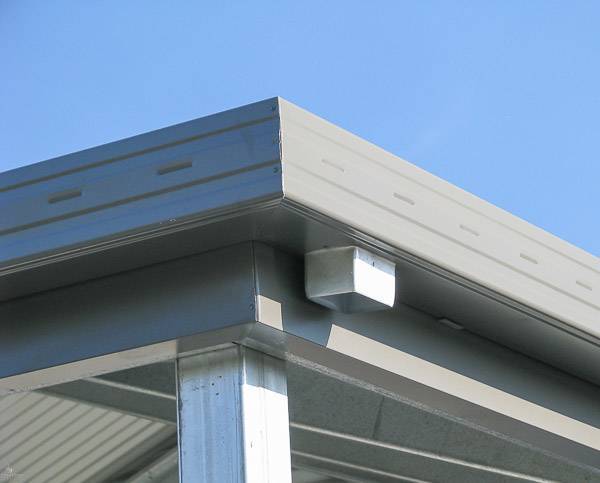
Fit the fascia capping to the perimeter of the frame to mimic the look of your house. Typically, you will have two sides cut to length, and the other two sides will require simple cutting and folding to cleanly cover the corners.

Step 5: Screw the Roof Sheets to the Frame
Using the supplied roof screws, attach the roof sheets to the purlins. Do not just start at random; carefully follow the sheet layout instructions in your guide to ensure you start in the right place. (Note: For gable, hip, or Dutch gable roofs, it is easier to fix your fascia flashings before the roof sheets, as they sit under the bottom edge of the sheeting).

Step 6: Fix Gutters, Downpipes, and Flashings
Once your fascia flashings and roof are set, attach the guttering. After the gutters are fixed, install the remaining flashings, which may include barge cappings, ridge capping, hip flashings, and infill flashings. Use your rivet gun and silicone to ensure watertight seals.
Step 7: Clean Up (Crucial for Preventing Rust)
When you screw the sheets and flashings on, it creates tiny metal shavings known as “swarf”. You must sweep or use a blower tool to remove all swarf from the roof and gutters immediately. If left behind, these shavings will rust and permanently stain your Colorbond roof. Finally, do a complete walk-around to ensure every bolt, screw, and rivet is tight and secure.
Frequently Asked Questions
Can I build a carport kit by myself?
Yes, many people successfully build their own kits. However, having a second pair of hands makes lifting the frame and positioning larger components much faster, easier, and safer.
Do I need power tools?
Yes, a cordless drill or impact driver is absolutely essential for driving screws and bolting the frame.
What is the best way to save money on installation tools?
Instead of buying expensive access equipment like scaffolding, scissor lifts, or laser levels, it is highly recommended to hire them locally, as you only need them for a short window of time.
Ready to start your DIY project? If you are ready to add value to your property with a structure that is engineered to last, contact us on 1300 011 191 or request a carport quote today to get the perfect kit for your home.